
Construction Tips for building a Dance Floor
Started December 2011
This project took about 8 months (mostly weekends) to complete. In addition to info on my own dance floor and studio, people have been sending me links to other projects and I’ve listed those at the bottom of this page.
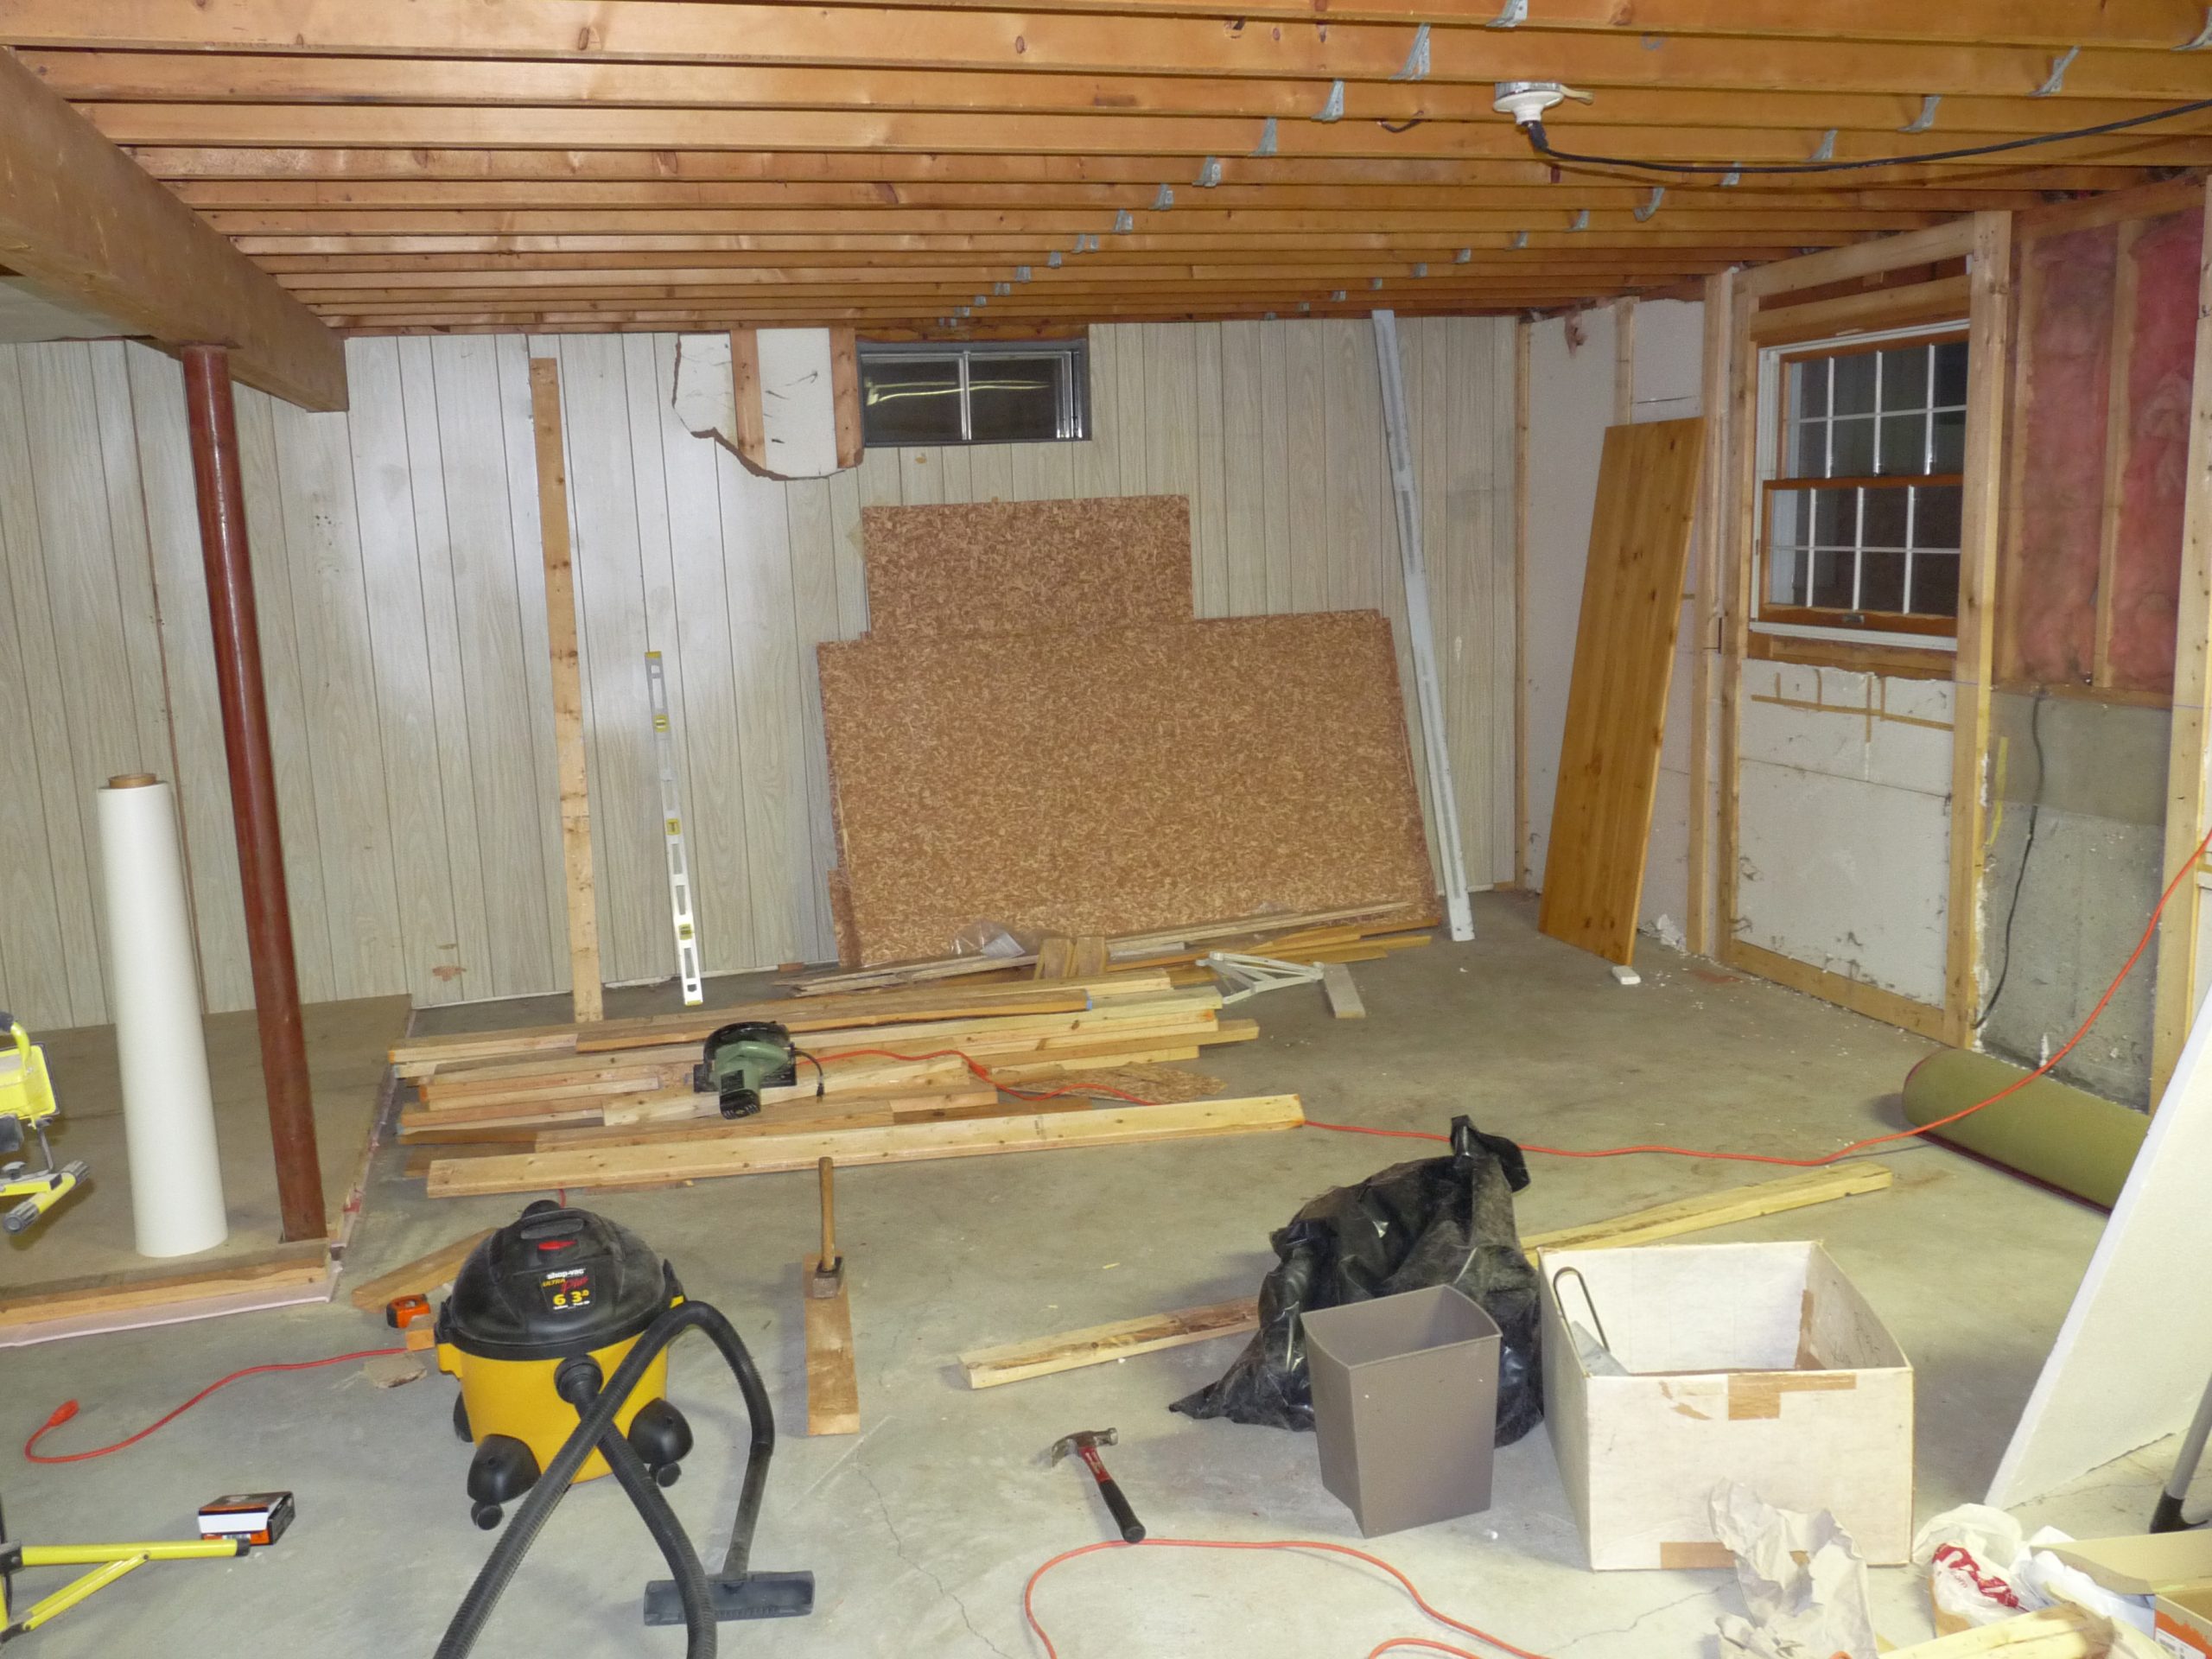
Framing
If you need to do any framing for your studio, you might want to consider using screws. I believe it’s about as fast as using a hammer and cheaper than buying a nail gun and compressor. Another advantage to screws is that you can easily remove them if you make a mistake and if you’re a weekend carpenter like me, you’re bound to make a few mistakes or simply change your mind.
I started using screws because I was having carpal tunnel issues in my left hand–not the hand I swing the hammer with, but the hand I use to hold the nails. Apparently I hold the nails very tightly between my fingers, but I don’t hold the screws as tightly because I don’t have any problems with the latter.
And never assume all screws are equal. If you attempt using 3 inch sheetrock screws you’ll probably need to drill pilot holes. Instead, pay the extra money for the PowerPro Brand (available at Ace Hardware stores). They’re the best screws on the market. Look closely at the bottom and you’ll be amazed at the technology that goes into these little hunks of metal. They’re self-tapping, self-drilling and counter-sink themselves. (2023 Note: I’ve since found other similar brands.)
There were also a few places where I needed to secure my bottom plate (2×4) to the concrete floor. In the past I’ve tried Tapcon screws with varying results and I’m a little scared of the method that requires a 22 caliber shell. (Too many “what-ifs” in my mind.) Instead, I’m a big fan of drilling a hole through the 2×4, into the concrete (hammer drill required) and then driving two galvanized nails simultaneously into the hole. Even if they get to a point where you can’t drive them all the way in, you simply bend them over and you still have a well secured wall. You can see a video of this technique on YouTube:
http://www.youtube.com/watch?v=87DNQfFdIbA You may need to check your local building code when it comes to laying 2x4s over concrete. Some communities require the bottom 2×4 to be pressure treated. I take issue with this rule, especially when the pressure treated lumber at my local store was literally dripping with preservatives. I know they say it’s safe, but that’s what they said 20 years ago about the old style pressure treated lumber, which is now banned in most states. Instead, I put down a double layer of the sill-plate insulation under my 2x4s. It comes in small rolls and is about 6 inches wide and 1/4 inch thick. You could also use strips of the 1/4 inch fan-fold insulation that I used under the dance floor. (This is the same insulation that builders use under vinyl siding.)
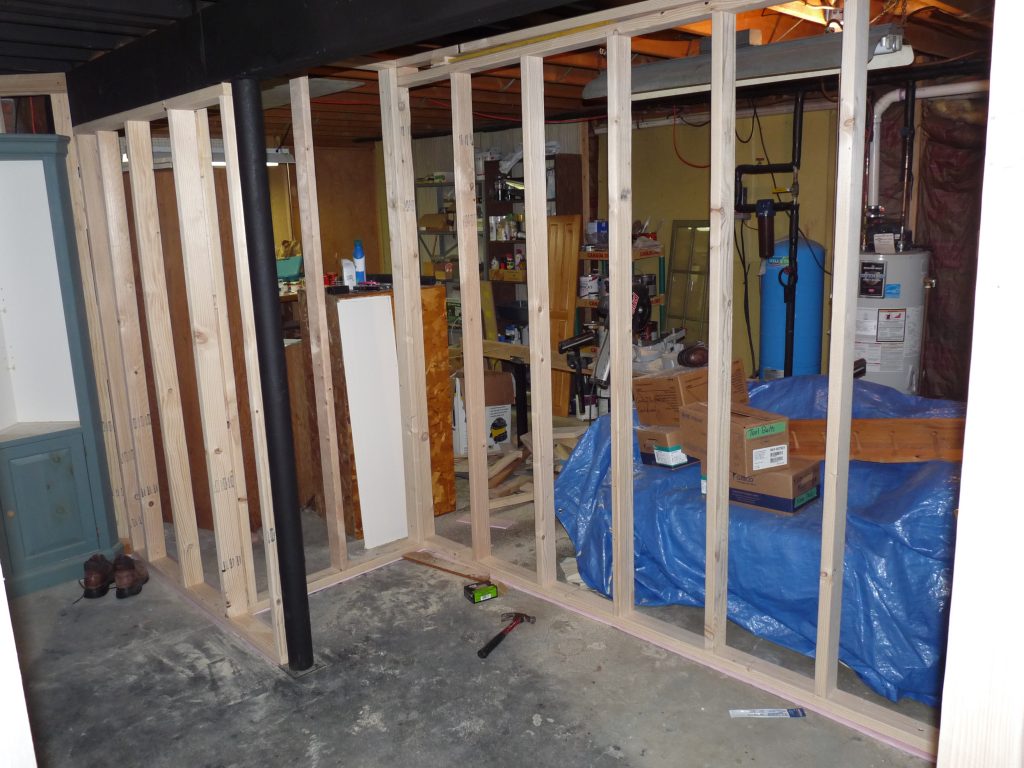
Studio Ceiling
Most basement ceilings are on the low side and that’s the case with mine. To preserve the appearance of as much height as possible (and because I hate hanging sheetrock on the ceiling), I used a Wagner Spray-painter to paint the ceiling of the studio. That’s a lot of surface area because you’re painting the sides of the floor joists as well as the underside of the floor above. I believe I used about 3 gallons of flat black paint (cheap stuff) to cover about 500 square feet. (That included the hallway outside the studio.)
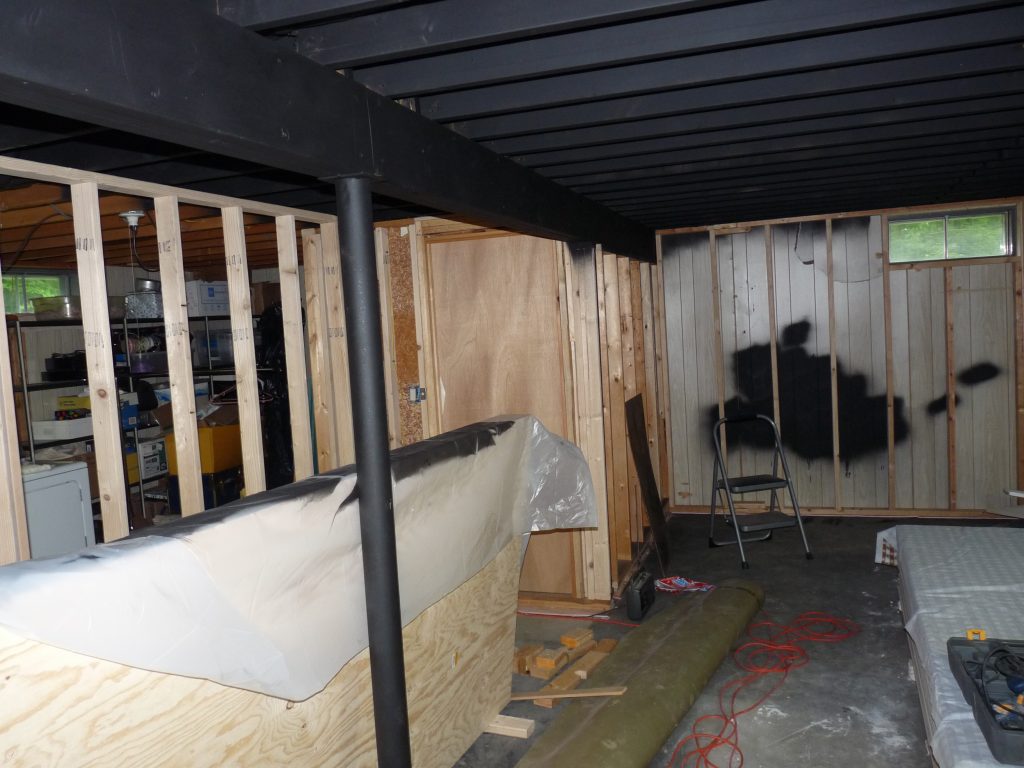
Keep in mind that any interior wall running perpendicular to the floor joists will have gaps at the top where you can see the ceiling in the adjacent rooms. In the hallway I cut out 3/4 inch foam rectangles and jammed them into those spaces and also painted them black. In the studio I left those gaps because I wanted some heat from the propane heater in the adjacent room to circulate into the studio in the winter time and the dehumidifier in the adjacent room to help dry the studio in the summer.
If you leave those gaps at the top of your walls open, then you’ll need to spray paint your ceiling about two more feet into the next room because it will be visible from the studio. I did my spray painting before I built my walls, so I had to calculate that ahead of time.
Sub-Floor
I agonized over the floor design for months. In my previous studio I laid a floating wood floor (not laminate) by a company called Baltic. (Great Northern also makes a floor of similar quality at about the same price.)
I chose the floor because it is real wood with absolutely no visible seams. As a result, you can do a ronde and not hear the “tap, tap, tap” sound of your toe running across micro bevels that are so common on today’s hardwood floors. However, the floor always seemed a bit “fast” or slick. (I have the mat finish.) It’s also my feeling that floating floors lack a feeling of substance and have a slightly hollow sound to them. When dancing on them, you could even say they’re noisy. This may not be the case will all floating floors, but it is with my old studio floor.
In building the new floor, I wanted more substance without sacrificing much headroom. In other words, I didn’t want to raise the floor up too much, because the ceiling is only 7’5″ above the concrete. So here’s what I ended up with:
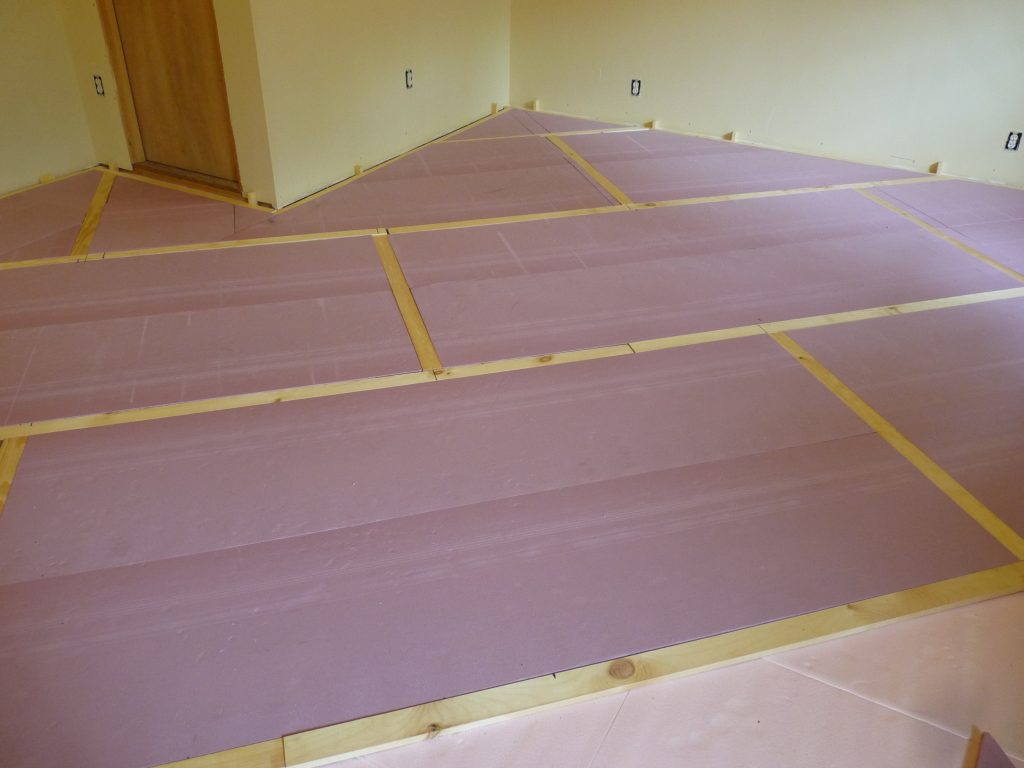
Bottom Layer
Owens Corning Foamular 3/8 in. x 48 in. x 50 ft. Fanfold –the type used on house exteriors under vinyl siding.
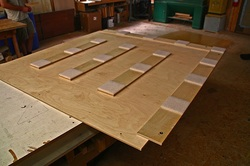
Middle Layer: A grid of 1″ x 4″ pine, shown in the photos. Each rectangle of the grid is 4 feet by 8 feet. Not shown in the photos, I decided to run a strip of 1″ x 2″ pine across the middle of each 4′ x 8′ rectangle, so in the end the grid was all 4′ x 4′ squares.
I filled the gaps between the pine with 3/4″ foam board insulation. Note: Wood dimensions are based on rough cut lumber dimensions. I used finished lumber so a 1″ x 4″ is actually 3/4″ x 3 1/2″. This means the 3/4″ foam board is a perfect fit to fill the gaps and gives great support for the top layer.
At first I tried to use Tapcon Screws to attach the pine grid (thru the fanfold insulation) to the concrete, but sometimes the screws seized up before the heads were flush with the wood. In the end, I used a 5/32″ x 4 1/2″ concrete drill bit to drill through the wood and fanfold and into the concrete. I drilled a hole about every 2 feet along the grid and then hammered two 6d 2″ galvanized nails simultaneously into each hole. As long as they go most of the way in, it doesn’t matter if they bend over part way.
I’m told the two-nail in a hole method is an old carpenter’s trick and wondered how secure it would actually be until I accidentally split a piece of wood and found it nearly impossible to pry it up. At first I tried my “wonder” bar, but that didn’t give me enough leverage. I had to turn to a full size crowbar to pry up the board. A few times I felt that the connection wasn’t firm, so I hammered a third nail into the same hole and that firmed it up.
Floor - Top Layer
New England dancers are familiar with floors at conventions provided by Bill Cameron. Bill uses 5′ x 5′ Baltic birch plywood coated with polyurethane. I wasn’t sure I could get 5 foot wide sheets down my basement stairs so I went with birch plywood from Home Depot (7 ply).
The plywood was supposed to be patch-free, finish grade, but once I got home I found a few pieces had patches. I used them anyway and they look fine.
Before laying each sheet, I lightly beveled the edges because it’s virtually impossible to get every edge to line up perfectly and a slight bevel prevents a dancer from catching an edge. My grid of pine “sleepers” and the top layer of plywood run on the diagonal for both aesthetics and to hide any imperfections in the “squareness” of the room. I was fortunate to have only one pole in my studio and since it’s impossible to put a pole in the middle of a piece of plywood without extra cuts, I had built my grid so that the pole would be along the edges of two sheets of plywood.
I screwed the edges of the plywood to the 1 x 4 grid using two different types of screws: Power Pro Trim Screws 8 x 1 5/8 (no pilot or counter-sink hole needed), and 1 5/8 inch sheetrock screws (no pilot needed, but you do need a slight hole to counter-sink the screw head). I used two types of screws because I couldn’t decide which I liked better. The Power Pro Trim screws save a step, but the wider head of the sheetrock screws may old the plywood better over time.

The screws are spaced 1 foot apart. There are also three screws across the middle of each sheet of plywood holding it to the 1 x 2 pine strip. I also applied construction adhesive between the pine sleepers and the plywood. (Note: I forgot to apply the adhesive under the first couple sheets of plywood and those squeak under certain weather conditions.)
Even though my concrete floor wasn’t perfectly flat I was extremely pleased with how well the plywood lined up and evened out the imperfections in the concrete. There are only a few places in the entire floor where you can feel a slight ridge between two sheets of plywood and the bevel prevents those spots from being a problem. I applied three coats of oil-base polyurethane, using a brush along the edges and a standard paint roller for everything else.
I used 320 grit sand paper in a little palm sander after the first and second coats. it only took about 20 minutes to sand the floor each time. It’s just a really quick pass with the sander.
Twelve Years Later: The floor still looks like amazing. Occasionally I’ve had a female student who wears spike heals, which leave faint dimple marks, but that’s about the only issue. More than ever, I’m a big proponent of oil-based polyurethane as long as you vent the space with open windows and fans while you’re applying it and for a while afterward. One local town where I teach has passed a “green law” requiring the town buildings to use only water-based polyurethane. as a result, the community center where I teach some of my larger classes has constant problems with the floor changing with the weather. Whenever the weather is rainy or humid, the floor is sticky.
About a year after completing the floor (around 2012), I received a call from James Matthews of North American Plywood Corp. who provided me with some more information on plywood. His company wholesales Russian plywood (aka Baltic birch). I don’t know where Bill Cameron buys his plywood, but I know he uses a similar type. It comes in 5×5, 4×8 and 4×10. It’s 100% birch, compared to what I used which is a thin birch veneer over poplar or fir. According to Mr. Matthews, Russian or Baltic plywood has a 1.2 mil veneer compared to the usual .5 or .6 and has no voids. When I was cutting my plywood (from Home Depot) I found it had some voids, although, so far no one’s heel has broken through.
If you want to talk to James Matthews, he can be reached at 800-759-6606 ext. 207. His company is based in New Jersey, but they distribute to venders in other parts of the country. If you want to buy directly from him the 2012 price of 5×5 Birch plywood was $30.31 for a minimum of 33 pieces plus shipping. 2023 Note: Due to the war in Ukraine, I’m told it’s nearly impossible to buy Baltic Birch at the present time.
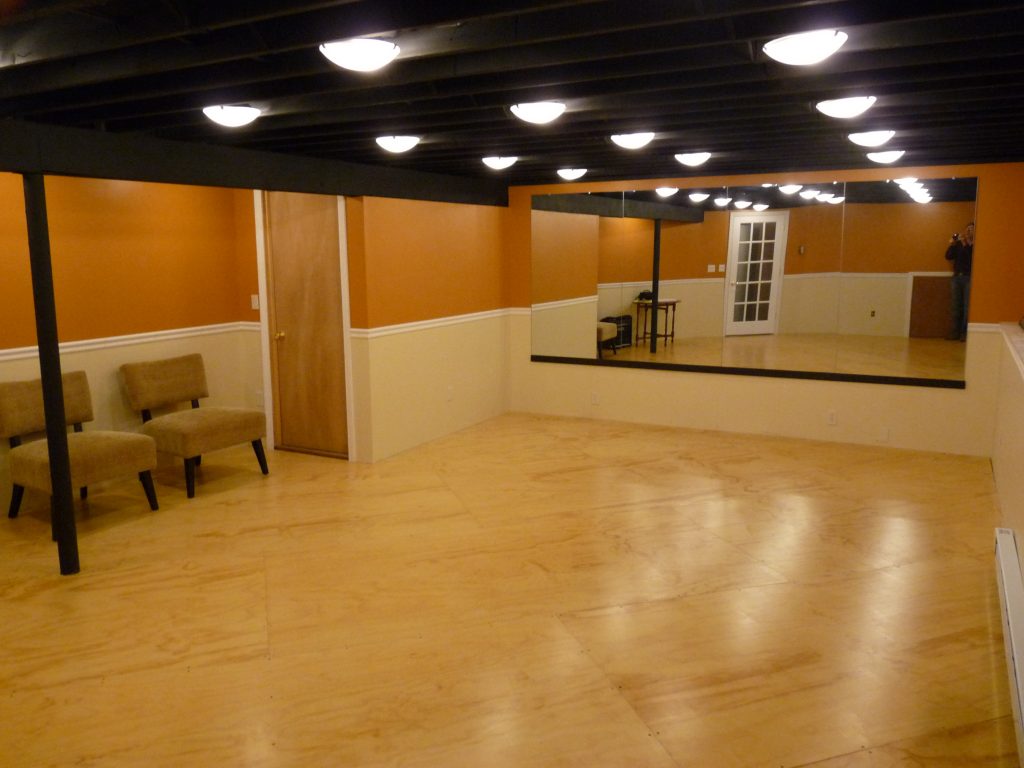
Mirrors
This mirror is 12 feet wide and 5 feet high. It’s comprised of four 3′ x 5′ sections that I purchased at Home Depot in 2012 for $59 each (SKU # 548208). i was planning to hang them 24 inches above the floor, but due to my ceiling being on the low side, I opted for 22 inches off the floor.
Anywhere I stand in the room I can see my feet and my hand when raised above my head. (I’m six feet tall.) A common mistake people make is to think a mirror needs to be hung near the floor in order to see your feet, but this isn’t true. You can save money by getting a smaller mirror and go up from 24 inches. An exception is if the dancers are small children. A child 4 1/2 feet tall can still see his or her feet in my mirrors, but a smaller child would need a lower mirror. Of course, this is due to the angle of the eye viewing the feet.
I supported the mirror on a 1×3 (actually 3/4″ x 2 1/2″) and notched one corner to accept the mirror. I used the little plastic mirror holders that came with the mirror to hold the top. I used nothing on the sides. The advantage of using the 1×3 at the bottom is that the wall studs aren’t always spaced exactly where you need them to support the mirror and this doesn’t matter with one long extended board. The plastic pieces at the top don’t carry any weight, so it isn’t a big issue.
If I were to do this project over again, I would build the wall behind the mirror with metal studs, because it needs to be perfectly flat, otherwise the seams between the mirrors will be either concave (making you look skinny) or convex (making you look fat). (Some of your students might actually like the concave.) I’m embarrassed to say my wall was so wavy, it was a bit of both and It took me a few hours of stapling cardboard to the wall before the mirrors lined up properly.
Years from now when somebody removes the mirrors they’ll probably wonder what the heck I was doing. A word of precaution about handling mirrors: Home Depot only sells mirrors with polished edges which are safe to handle with your bare hands, but if you happen to buy mirrors that aren’t polished on the edge, wear heavy leather gloves. I once had a mirror professionally installed and the pro used suction cups to lift it. And, of course, don’t use mirrors with beveled edges if you plan to butt them together.
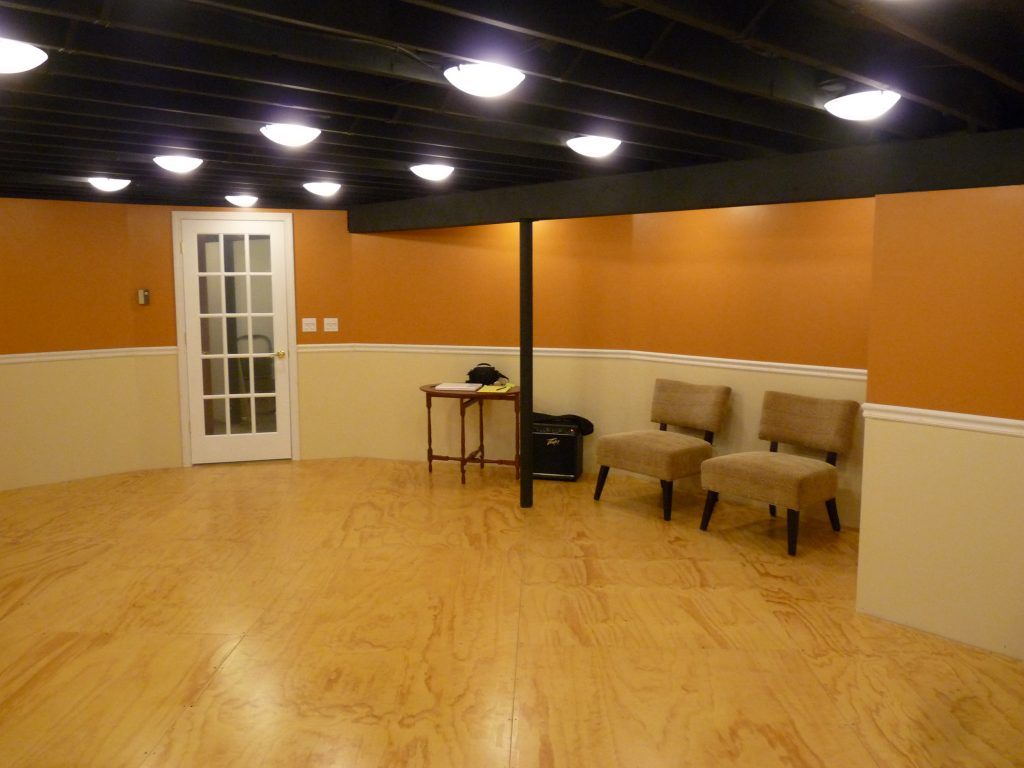
Lighting
I experimented will all sorts of lights. The only thing I knew from the start was that, considering the significant amount of light I wanted, incandescent bulbs were out of the question. They would have made the studio too warm for dancing.
I first tried can lights fitted with LEDs and then with CFLs. The general problem with can lights is that they create a cone of light that leaves the top third of your walls in shadows. I tried dropping the lights below the bottom of the can by using the type of convex trim that’s used in showers, but that didn’t help much. Also, the cost of all these solutions was fairly high. In the end, the cheapest solution turned out to be the best.
I bought what Home Depot describes as Commercial Electric Brushed Nickel 1-Light Clip Flushmount (SKU 631 253) for $6.97 plus the cost of the light bulbs. If your ceiling is white, you can use these lights right out of the box. Since my ceiling is black, I disassembled (with the help of my 12yo son) 23 of these, spray painted the housing and the put them back together again. You only have to remove three screws to take these apart–but be careful, because one screw on each light holds a spring which has a tendency to fly off into the darkest corner of your workshop.
The actual danceable space in my studio is 25′ x 14′. I ran six lights down one side, five lights down the middle and six lights down the other side. In other words, the spacing of the lights is staggered from row to row. 17 fixtures with a 60 watt equivalent CFL (actual watts: 14) provides wonderfully sufficient lighting. I also have three more fixtures off to the side of the chairs and sound system, and another three in the hall outside the studio.
The four rows of lights (three over the actual dance area and one over the seating area are on four Leviton dimmer switches and the three hall lights are on a Lutron dimmer switch. (Get the ones rated for LEDs and CFLs.) I was planning to use Lutron switches in the studio as well, but when I tried ganging them together, I found that they have little metal fins designed to disperse the heat and the fins take up too much space. Lutron instructs you to cut off some of the fins when you gang the switches, but for every fin you remove, you’re decreasing the number of watts that switch can handle. The Leviton switches don’t have this problem, so I went back to Home Depot and got the Leviton.
I installed dimmers because I would like to be able to dim the lights for social occasions, but would I do it again? Maybe not. For one thing, the CFLs I used are supposed to be dimmable, but the technology still isn’t very good. You can dim the light a little bit, but around the half way point, some of the bulbs go out entirely. This problem is true of the string of lights with as few as three fixtures and the strings with as many as six. Also, the dimmable CFLs are much more expensive than the non-dimmable (around $8/bulb for dimmables and $1.75 for non-dimmable).
My hope is that the cost of LEDs is dropping and the first 60 watt equivalent bulbs are finally reaching the market (currently $25 each), so within a few years I might try some LEDs in my fixtures and perhaps they’ll be better at dimming. As for the quality of the light, I personally like light that’s on the warmer (yellower) side of the spectrum and am very pleased with the Philips Soft White. That’s a personal choice. You might prefer a whiter light.
Polyurethane - Word of Caution
I’ve finished a lot of floors in my life and usually I provide enough ventilation, but twice I’ve been either lazy or forgetful about opening windows and setting up fans. (The previous time was about 25 years ago).
In the most recent case involving the dance studio, it was a cold November night and I thought I could get the first coat down fast enough that I wouldn’t have to breath the fumes for too long, but I was wrong. As soon as I finished, I realized how dizzy I was. I stumbled outside and laid down on the driveway. My wife forced me to get up and kept me walking around the neighborhood for a while and all I wanted to do was lie down. I tried eating later, but was to nauseous. I was disoriented and light-headed for the next three days. After that I had good days and bad days for about a month.
I’ve now gone two weeks without any symptoms and I’m feeling myself again, but it was a scary experience and it troubles me to think I may have killed a few brain cells in the process.
Please don’t underestimate oil-based polyurethane. It gives you a great floor, but it can also harm you. On the next two coats, I set up one fan blowing air in and one fan blowing air out. I did the edges first and then left the room. Later I returned and rolled the rest of the floor as fast as I could (about 35 minutes). Ventilation is key.
Links to other Dance Floor Projects
Folk Floor at the Roadhouse
Dance Flurry Floor
Andrew Pate designed this floor for the Flurry Festival. The panels have foam pads underneath that give a spring-like effect. Each panel is 5′ by 5′ and designed to interlock with adjacent panels.